Showing posts with label Beauty. Show all posts

Monday, 18 July 2016

All About Apricot Kernel Oil!

Over the past year I have been trying out as many different oils as I can get my hands on! One that I keep going back to is Apricot Kernel Oil. Not only do I find it moisturizing and light but it is also very affordable!

Why Apricot Kernel Oil Is Amazing! via Happily Ever Green


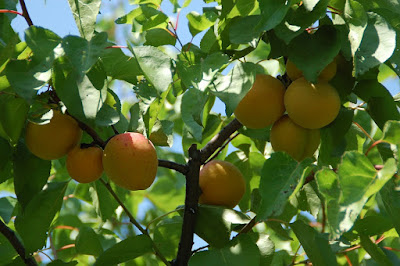
Apricot kernel oil is derived from the seed (or kernel) of the apricot fruit. The apricot tree is said to have originated in Armenia (it's scientific name is Prunus Armeniaca meaning Armenian Plum) although others believe it was first found in China or India. What we do know however is that it has been widely popular throughout the ages, there are stories and accounts of this tree all over Asia and Europe and more recently Africa, North and South America and Australia. Today, the top exporters of apricots include Turkey, Iran, Uzbekistan, Algeria and Italy.


Why Apricot Kernel Oil Is Amazing! via Happily Ever Green


The fruit has long been used both fresh and dried in a variety of ways such as drinks, desserts and medicinal purposes. In fact, in traditional Chinese medicine they are known for being able to cure many ailments including coughs, asthma and even tumours! Dried Apricots are one of my favourite snacks and perfect for taking on a hike! The seeds from apricots grown in central Asia and the Mediterranean are so incredibly sweet that they began using them in place of almonds. It is commonly used in cooking but also has amazing properties that benefit your skin!


Reasons why I love Apricot Kernel Oil:
- Very light, easily soaks in to your skin leaving it without that oily feeling.
- Rich in Essential Fatty Acids which soften the skin and improve it's texture.
- It has an anti-inflammatory effect and is said to be great for soothing skin conditions such as eczema or keratosis pilaris.
- Contains vitamin E which is an antioxidant and vitamin A which normalizes and repairs the skin.

I am currently using it for:
- Massage
- Face Oil
- Body Oil
- Carrier Oil
- Skin Scrub (with sugar!)
- Hair Treatment

Do you use Apricot Kernel Oil? Be sure to let me know in the comments below!

** I purchase my Apricot Kernal Oil through Well.ca! Use coupon code ' HappilyEverGreen ' for $10 off your purchase of $40 or more! Enjoy! :)
Monday, 27 July 2015

DIY Light and Nourishing Face Oil

Hey Everyone!

I have tried quite a few face oils over the past few years but have found them to be expensive! Since then I decided to make my own and have been loving it! This is my go to face moisturizer! One of the reasons I love this oil is that it has an Aloe Vera base, many of the less expensive face oils I have tried have a water base. You can read about all the benefits of Aloe Vera in my previous post!

This small jar lasts me about two weeks, I use it both morning and night on my face and neck.

You can add or subtract the Aloe Vera based on your skin type. My skin type is combination but if yours is oily you may want to add more Aloe Vera, or less if yours is dry.


What You Will Need:


DIY Light and Nourishing Face Oil - Happily Ever Green


- Small jar (Mine is an old lip scrub jar from Lush!)
- Aloe Vera Gel
- Apricot Kernel Oil
- Jojoba Oil
- Your favourite Essential Oils, I am currently using Tea Tree Oil and Rosehip Oil.


How To:


1. Pour 4 parts Aloe Vera, 2 parts Apricot Kernal Oil and 1 part Jojoba Oil in your jar.

2. Drop in 5 drops each of your favourite Essential Oils.

3. Shake your jar to mix all the contents.

DIY Light and Nourishing Face Oil - Happily Ever Green


It's as easy as that! Now apply to clean and toned skin both morning and night! Because of the Aloe Vera it does not take long to sink into your skin and you can apply your makeup directly on top in a matter of minutes. Make sure you shake your jar between each use, as there is no emulsifier the oils and aloe will separate
.

Let me know if you try out this Face Oil and which Essential Oils you chose!


Peace & Happiness,

Jules

** I purchased all of my oils through Well.ca! Use coupon code ' HappilyEverGreen ' for $10 off your purchase of $40 or more! Enjoy! :)


Monday, 6 July 2015

Parissa Chamomile Body Sugar Wax - Review and How To

I've used razors and wax for a long time now but I have recently been looking for ways to green up my hair removal routine! While I love the convenience of shaving, I hate having to do it so often! Wax is also a great method but I'm not a fan of the ingredients which is why sugaring really appealed to me. You can make it at home with simple, natural ingredients (water, sugar, lemon) but seeing as I'm a newbie I wanted to find one that I could purchase.

I came across the brand Parissa which is not only cruelty free but is Canadian as well! They have quite a few products to choose from but the one I purchased was conveniently available at my local Walmart.

What comes in the box:

Parissa Chamomile Body Sugar Wax - Review and How To
{via}
- 20 large reusable strips * You can cut these for smaller areas
- 2 large wooden spatulas
- 1 precision wooden spatula
- Azolene Oil *Made from Chamomile Flowers, great for preventing ingrown hairs
- Body Sugar * You can see I only used 1/5 of the jar for one use! ( Full legs, underarms, bikini area)

How to:

1. Ensure you have clean dry skin * I like to have a rinse in the shower (water only) and then apply powder (I use arrowroot powder, you can also use corn starch or natural baby powder) to the areas I am going to be removing the hair from.

2. Heat the sugar * Microwave on high for 20 seconds or place in water bath for a couple minutes. 

3. Apply sugar in the direction of hair growth and place the removal strip on top. *Gently rub the strip in the direction of hair growth to ensure it has adhered to hair. 

4. Pull skin taut and quickly remove the strip keeping it as close and parallel to your body as possible. 

5. If you have a couple spots that were missed you can immediately go back and remove the hair in the same manner. 

6. Dab on a small amount of Azolene oil in areas prone to ingrown hairs.

How To Sugar Wax + Review  - Happily Ever Green

Newbie Body Sugaring Tips:

* If this is the first time you are using body sugar make sure your hair has grown out a little more than usual, at least 1/4 inch. It has a difficult time grabbing on to short, coarse hair that has been bluntly cut by a razor.

*Always do a test patch 24 hrs before committing to it! You don't want to have an adverse reaction the day before a trip or day to the beach!

* Complete your hair removal the day before you will be showing it off so that any irritation or bumps have time to dissipate.

* Remove hair in small areas to start, it will become less painful as time goes on and you'll be able to do full strips.

* You may need to reheat the sugar to complete your hair removal if you do not keep it on a warmer or under a lamp. Pop it back in the microwave for no more than 10 seconds or back in a water bath for a minute. Ensure the sugar is smooth syrup like consistency.

* If you run out of strips you can wash them and use them damp!

* Exfoliate every day to prevent ingrown hairs, I love to use my body brush!

After using this product I would definitely purchase it again! One day I hope to overcome my fear and make it at home but until then, this is an easy and convenient substitute.

Let me know about your favourite hair removal method or product in the comments below!

Peace and Happiness,

Jules

* I purchased Parissa with my own money and as always all opinions are my own!